
Are you tired of those annoying Azurewebsites.net pop-up ads that keep interrupting your browsing? You are certainly not alone! However, there are several steps you can take to remove the Azurewebsites.net pop-up ads from your computer and keep them from bothering you in the future.
What are Azurewebsites.net Pop-up Ads?
AzureWebsites.net is a cloud-based web-hosting platform, completely legitimate and extremely secure brought to you by Microsoft.
It is an excellent resource for website publishers looking to speed up their websites or host content.
However, in an attempt to make quick money, some crafty programs out there redirect users to AzureWebsites.net without authorization.
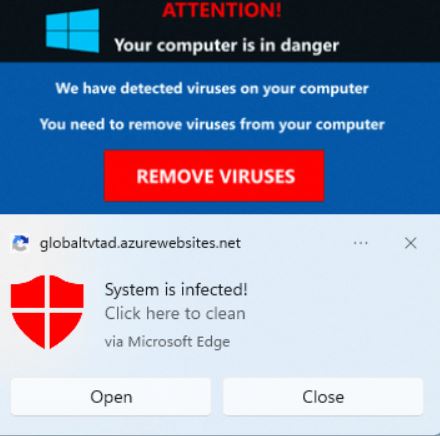
What’s more, guess what? When you visit AzureWebsites.net, you are bombarded with advertisements for things you probably don’t want.
They violate your privacy by tracking your personal information, spreading malware, conducting phishing attacks, and even hijacking your valuable browser settings.
In this article, we will walk you through eliminating this annoying browser threat.
We will provide you with a comprehensive guide and practical tips to help you stay safe online and avoid future infections.
So, let us get started and end this nuisance for the last time!
Azurewebsites.net Removal Procedure
The steps below will guide you through the process of removing those annoying pop-up ads from Azurewebsites.net, as well as any nasty malware, trojans, rootkits, or other viruses that may have accompanied them.
It is critical to be cautious when removing malware from your system and browser.
We have mentioned easy methods so that even those who are not very tech-savvy can easily remove the browser threat without the assistance of tech support or a computer expert.
1. Remove Azurewebsites.net from the Browser:
Most of the time, allowing an unknown website to display notifications to the browser is what triggers Azurewebsites.net’s pop-up advertisements.
Removing the authorization that you gave the previously mentioned website to use browser notifications for displaying advertisements is all that is required.
Google Chrome:
- Launch Google Chrome, and then click the three-dot menu.
- Choose Settings when the drop-down menu appears.
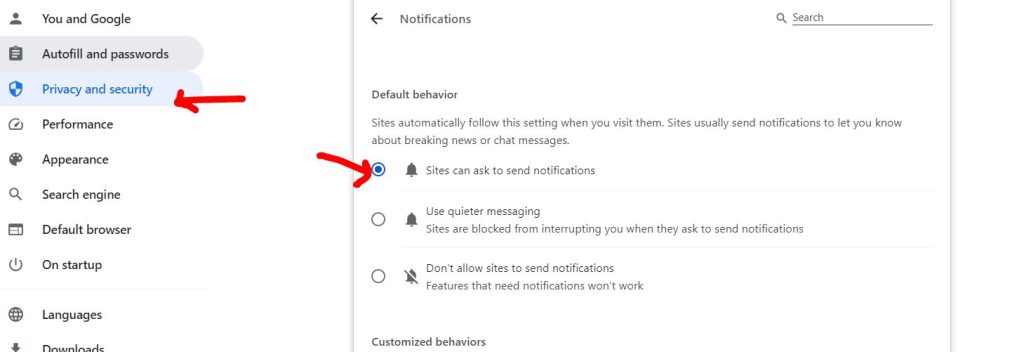
- Select Privacy and Security from the list of available options.
- Click on Site Settings.
- Locate the page’s Permissions section by scrolling down. To view all websites with notification access in the browser, click on Notifications.
- Under Allowed to send notifications, a list of websites that are allowed to display notifications will be displayed.
- Click the three dots next to the link and choose Remove to remove the website.
Mozilla Firefox:
- Open Mozilla Firefox and click the three horizontal lines menu.
- Choose Settings from the drop-down menu.
- Navigate to Privacy and Security.
- Locate the Permission section by scrolling down and selecting Settings next to Notifications.
- A window that allows websites to display notifications will open.
- By choosing the URL and selecting the Remove Website button, you can get rid of the Azurewebsites.net pop-ups.
- To allow notifications, there will be an option to “Block new requests.” You can check the box if you don’t want websites to request notifications.
- After you have finished making changes, click Save Changes.
Microsoft Edge:
- Press the three-dot symbol located in the upper-right corner.
- Click on Settings.
- Choose Cookies and Site permissions.
- Choose Notifications from the list beneath the site permission section by swiping down on the Cookies and Data Settings page.
- Find Azurewebsites.net in the Notifications page’s Allow section.
- Click Remove after selecting the three horizontal dots.
Safari:
- Start the Safari web browser.
- Select Preferences using the drop-down menu.
- Click the Websites tab after a window opens.
- Select Notifications.
- Choose the URL or URLs you do not recognize and click the Remove button to remove the website from Safari.
2: Remove Suspicious Browser Extensions:
Azurewebsites.net pop-ups can also result in the installation of malicious browser extensions.
These extensions are commonly used by cybercriminals to deliver malicious advertisements to unsuspecting users.
It may also function as a type of spyware, tracking web data such as history, cookies, and saved passwords.
Google Chrome:
- Open the browser and select the three horizontal lines
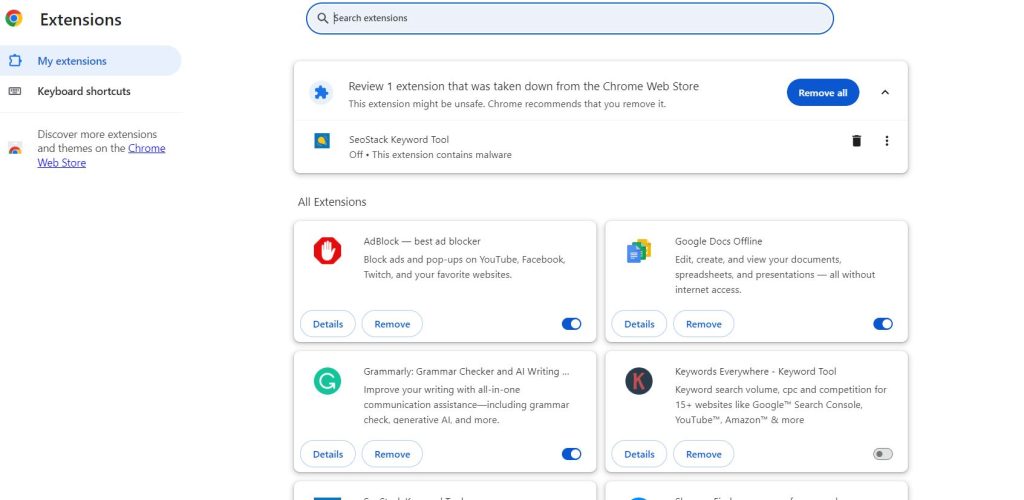
- Hover over Extensions and select Manage Extensions from the submenu.
- The extensions page will be displaying all of the browser’s installed plugins.
- Once you have found it, toggle the blue switch to deactivate the browser extension.
- After that, you can remove the extension by clicking the remove button.
Mozilla Firefox:
- Open the Firefox browser and click on the three horizontal lines menu.
- Select Add-ons and Themes.
- Go to the Extensions page to view all of your Firefox browser extensions.
- To deactivate the plugin, toggle the blue switch, and select Remove to remove it from the browser.
Microsoft Edge:
- Launch Microsoft Edge, you can select Extensions from the horizontal three-dot menu.
- The page will then display all of the extensions that you have installed in the Microsoft Edge browser.
- Toggle the blue switch to disable the one you suspect is infected with a virus or is a malicious plugin.
- Then, uninstall it by clicking the Remove button next to Details.
3. Uninstall Malicious Programs from Windows:
Windows 11:
- Click on Start button and choose “Settings” from the menu.
- Select “Apps & Features” after selecting “Apps” in the sidebar.
- Scroll down to the app list in Apps & Features settings and search for unknown or suspicious programs.
- When you find a malicious program, click the three dots button next to it and choose “Uninstall”.
- Now, confirm the uninstall process by clicking Uninstall, and then follow the on-screen instructions to remove the malicious program.
Windows 10:
- To open the Settings app, press the Windows key + I on your keyboard.
- Click on “Apps”
- Scroll down to the app list in Apps & Features settings and search for unknown or suspicious programs.
- When you find a malicious program, right-click it and choose “Uninstall” from the pop-up menu.
- Click Uninstall to confirm the removal of the malicious program, then follow the on-screen instructions to do so.
Windows 8:
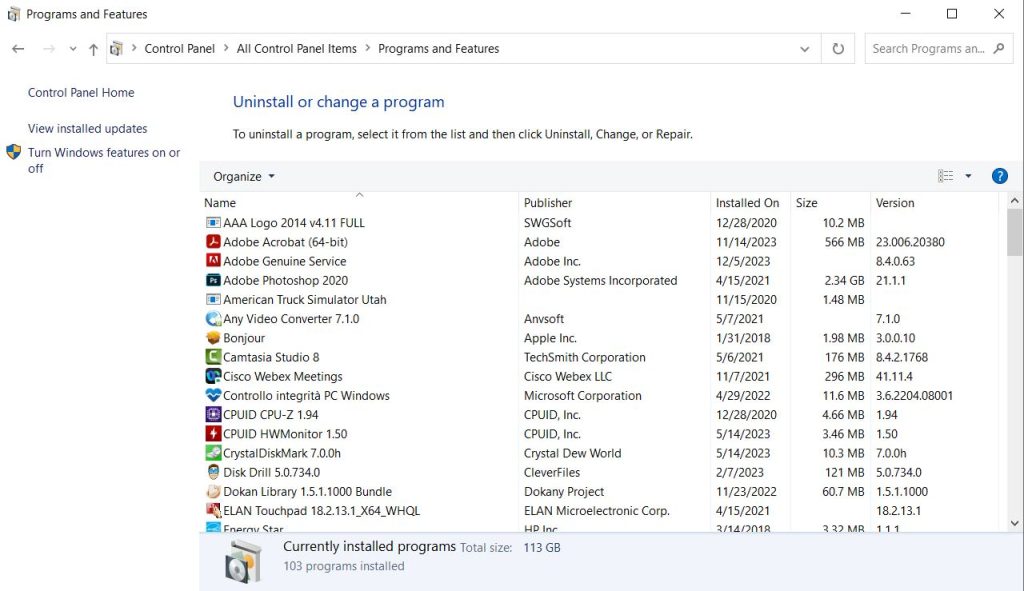
- Open “Programs and Features.”
- A list of all the installed programs on your computer will appear on the “Programs and Features” screen.
- When you come across any unfamiliar or questionable program, scroll through the list, click to highlight it, and then select the “Uninstall” option.
- Click Yes to confirm the uninstall process in the ensuing message box, then adhere to the on-screen instructions to remove the malicious software.
Windows 7:
- After choosing “Start” select “Control Panel.”
- In the Programs category, choose “Uninstall a Program”.
- A list of all the installed programs on your computer will appear on the “Programs and Features” screen.
- Once you have found any suspicious or unfamiliar software, scroll through the list, click to highlight it, and then select the “Uninstall” option.
- Click Yes to confirm the uninstall process in the ensuing message box, then adhere to the on-screen instructions to remove the malicious software.
4. Reset Browsers Back to Default Settings:
Chrome:
- Click the menu button (three vertical dots).
- Click on “Settings”.
- Click the “Advanced” link in the left sidebar.
- Click “Reset and clean up” in the “Advanced” section of the left sidebar.
- Select “Reset to original defaults” from the menu.
Firefox:
- Click the three horizontal lines menu button.
- Pick the “Help” option.
- From the Help menu, choose “More troubleshooting information”.
- Click “Refresh Firefox”.
- Click the “Refresh Firefox” button in the newly opened confirmation window to complete the reset process.
- Select “Finish” by clicking.
Microsoft Edge:
- Select the Microsoft Edge main menu icon
- Click “Settings”.
- Click “Reset Settings”.
- Select “Restore settings to their default values”.
- Click the “Reset” button to finish the restoration process.
Internet Explorer:
- Launch Internet Explorer
- Select “Internet Options” by clicking the gear icon.
- Choose the “Advanced” tab in the “Internet Options” dialog box, then press the “Reset” button.
- Select the “Delete personal settings” checkbox in the “Reset Internet Explorer settings” section, then press the “Reset” button.
- In the confirmation dialog box, select the “Close” button once Internet Explorer has finished its work.
5. Scan with Powerful Malware Removal Software:
It is frequently impossible to identify malware by simply looking at the programs or browser extensions because it hides completely within the registry and system files.
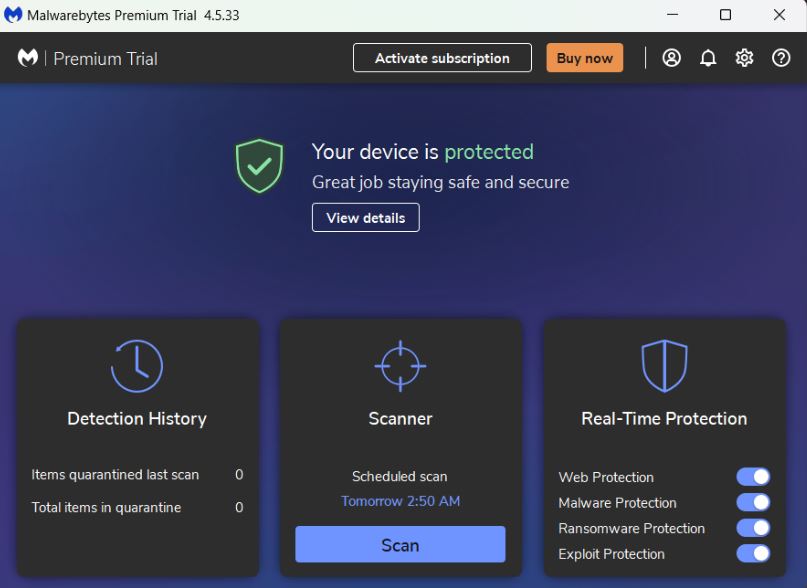
To get rid of these malware threats, run a full system virus scan with Malwarebytes Anti-Malware.
Security experts are familiar with and respectful of this software when it comes to eliminating viruses from the system.
Remove Azurewebsites.net with Malwarebytes Anti-Malware:
Here are the instructions for using Malwarebytes to get rid of dangerous software from the computer:
- Go to their download page and initiate a Free Download.
- Then, right-click the setup and choose “Run as administrator.”
- Select the scan tab and start a system scan from the application’s home screen.
- This will perform a comprehensive system scan, encompassing the memory, startup items, registry, and file system.
- Malwarebytes will display the harmful viruses and threats discovered on your computer after the scan is complete.
- To prevent malicious items from affecting or harming the computer again, select all the detected files from the report, and click the quarantine button to remove them from the computer.
- To complete the entire system scan process, the program might ask you to restart the computer after quarantining the virus files.
- You must restart your computer if prompted.
- Malwarebytes will launch following the restart and indicate that the scan is finished.
Also, Know How to Remove Soogandrooped.cam Pop-up Ads
Conclusion
Although this may seem like standard advice, we advise users to avoid visiting websites that offer illegal streaming or torrenting.
In addition, more importantly, to avoid downloading anything from them as this could lead to the installation of viruses and malware.
Make sure your device is always shielded from sly cyberattacks and cunning exploits.
As important as it is to exercise caution and steer clear of questionable websites, maintaining a strong line of defence is critical to guarantee the security of your network and data.

It’s me Mosaab, the founder and leading author of MalwareYeti.com. Over the years, I have gained a lot of experience when it comes down to building or fixing computers. Throughout my journey, I’ve built gaming PCs, fixed irritating Windows errors, and removed sticky malware/viruses that have affected machines. You can learn more about me on our About us page.